

Description
Overview
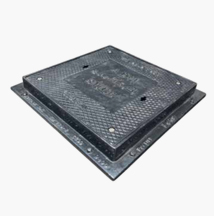
Multipart Slide-Out Covers and Frames are manufactured and supplied either with or without removable I-Beams, depending on the customer’s specified pit opening dimensions.
This guide provides general installation procedures. For project-specific requirements, installation assistance and detailed guidance can be obtained from Ducast.
Each multipart slide-out unit consists of multiple frame segments, which may include:
- Frame units with single-end flange
- Frame units with double-end flange
- Frame units without flange
- I-Beam holders with double-end flange
- I-Beams fitted with L-angle segments (where applicable)
All frame segments are assembled into a complete frame using stainless steel fasteners.
The contact surfaces of both solid and recessed covers, together with the frame seating surfaces, are precision machined to provide:
- 100% metal-to-metal contact
- Uniform clearance between cover and frame
- Proper alignment between adjacent covers
- Optimum watertight performance when grease is applied before final installation
1. Pre-Installation Assembly
Frame components are generally supplied, dismantled and packed as a complete set with identification markings for easy assembly and transportation.
Assembly Procedure
- Assemble all frame components according to the identification markings.
- Position the assembled frame inside the pre-constructed rebate.
- Install the I-Beam holders into the prepared wall box rebate.
- For larger units, complete the assembly directly within the pit rebate.
Installing the I-Beams
- Lower each I-Beam/L-angle assembly individually into the corresponding I-Beam holder.
- Ensure the top of the frame is perfectly flush with the finished rebate level.
Levelling the Frame
- Support the frame using adequate spacers beneath all frame sections.
- Use steel plates or cement sheets as spacers. Avoid materials that may compress or crumble under load.
- Check the frame level using a string line and spirit level.
- Ensure all cover seating surfaces are perfectly level and linearly aligned.
Alignment Checks
Verify the following before proceeding:
- Measure the frame diagonally in both directions to confirm equal dimensions.
- Ensure the clear opening remains square.
- Confirm that the I-Beam holder seating does not project into the clear opening.
- Ensure the I-Beam holder stands at 90° to its base.
- Install rigid wedge spacers between the frame and rebate walls to prevent frame twisting.
- Thoroughly clean all debris from the frame seating and vertical contact surfaces.
2. Installation of Covers
- Remove all dirt and debris from the covers.
- Clean all seating and side contact surfaces.
Installation Sequence
After placing each set of covers:
- Adjust the levelling bolts on the frame and I-Beam holders if required.
- Ensure complete metal-to-metal seating.
- Walk over the covers to verify there is no rocking movement.
- Confirm proper alignment with:
- No gaps between cover and frame
- No gaps between adjacent covers
- Re-tighten all frame coupling bolts.
- If necessary, lightly tap the I-Beams and frame sections to achieve perfect alignment.
3. Shuttering
- Remove selected covers.
- Install shuttering around the inside perimeter of the pit.
- Position the shuttering approximately 10 mm higher than the underside of the frame.
- Reinstall the removed covers.
- Verify correct alignment and absence of gaps.
- Mask all cover keyways.
- Tighten the pre-fastened I-Beam holder lids securely onto the I-Beams.
4. Concreting
Use C45 Grade concrete (recommended).
Carry out concreting as follows:
- Fill the space surrounding the frame until the concrete reaches the shuttering.
- Properly tamp the concrete to eliminate voids.
- Fill the integrated L-angle cavity until it reaches the I-Beam holder lid.
- Tamp thoroughly.
- Fill the I-Beam holder lid with concrete.
- For recessed covers, pour concrete into the recessed cover trays as specified.
5. Grease Application
After the concrete has fully cured:
- Remove the covers one at a time.
- Apply a generous layer of grease to:
- Cover seating surfaces
- Cover side faces
- Frame seating surfaces
- Frame side contact areas
- Reinstall each cover carefully after greasing.
Proper lubrication ensures:
- Smooth cover operation
- Improved watertight sealing
- Long-term corrosion protection
- Reduced wear of machined contact surfaces
Important Notes
- Always refer to the approved engineering drawing for identification and positioning of all components.
- Where specified on the approved drawing, the frame shall be anchored exactly as detailed before concreting.
- Ensure all stainless steel fasteners are fully tightened prior to final concreting.
- Final inspection should confirm:
- Correct frame level
- Proper cover alignment
- Metal-to-metal seating
- Smooth operation of all covers
- Absence of rocking or visible gaps
Reviews
There are no reviews yet.